
Introduction:
Are you tired of that stubborn belly fat that just won’t seem to budge? Are you looking to achieve a flatter, more toned midsection and boost your overall health? You’re not alone! Many people struggle with excess belly fat, but the good news is that you can take control of your fitness journey and lose belly fat in just 30 days with the right exercise plan.
Belly fat isn’t just a cosmetic concern; it’s also linked to various health issues, including heart disease, diabetes, and high blood pressure. That’s why it’s essential to address it and work towards a healthier you. This 30-day exercise plan is designed to help you do just that.
In this comprehensive guide, we will walk you through a step-by-step approach to losing belly fat through exercise. We’ll cover effective workouts, dietary tips, and lifestyle changes that, when combined, will set you on the path to a flatter, more toned midsection. Whether you’re a fitness enthusiast looking to enhance your abdominal muscles or someone new to exercise, we’ve got you covered.
So, let’s get started on your journey to a healthier, more confident you. Over the next 30 days, you’ll discover how to target that stubborn belly fat, boost your metabolism, and build a stronger core. Remember, consistency is key, and with dedication and the right techniques, you can achieve your goal of losing belly fat and improving your overall well-being. Let’s dive in!
Losing belly fat through exercise in 30 days is a challenging but achievable goal if you commit to a consistent and targeted exercise routine.
Here’s a 30-day exercise plan to help you lose belly fat:
Mountain Climbers
Mountain climbers are indeed an effective exercise to help reduce belly fat and improve overall fitness. They are a high-intensity, full-body workout that engages multiple muscle groups, including the core, legs, and upper body. Incorporating mountain climbers into your fitness routine can help you burn calories, strengthen your abdominal muscles, and boost your metabolism, all of which contribute to reducing belly fat.

Here’s how to perform mountain climbers correctly:
Starting Position:
Begin in a plank position with your hands directly under your shoulders and your body forming a straight line from your head to your heels. Keep your core engaged to maintain stability.
Movement:
Alternate bringing your knees in toward your chest, one at a time, in a running or jogging motion. Keep your hips low and your back flat as you do this. Imagine you’re climbing a mountain, hence the name.
Pace:
You can perform mountain climbers at a moderate pace for a steady workout or increase the speed for a more intense cardiovascular challenge.
Duration:
Aim for 20 to 60 seconds of continuous mountain climbers, depending on your fitness level. You can start with shorter intervals and gradually increase the duration as you get stronger.
Repetitions:
Include mountain climbers in your workout routine by doing sets of 3-4 rounds with rest in between.
Remember these tips for safe and effective mountain climbers:
- Maintain proper form throughout the exercise to protect your lower back.
- Engage your core muscles to stabilize your spine and maximize the abdominal workout.
- Breathe rhythmically to ensure you’re getting enough oxygen during the exercise.
Russian Twists
Russian twists are a popular core-strengthening exercise that targets the oblique muscles. To perform Russian twists correctly, follow these steps:

1. Preparation:
- Sit on the floor with your knees bent and your feet flat on the ground. Your back should be straight, and your core engaged.
- You can perform this exercise with or without weights. If you’re using weights, hold a dumbbell, medicine ball, or any other suitable weighted object in both hands, close to your chest.
2. Execution:
- Lift your feet slightly off the ground, creating a “V” shape with your torso and thighs. This engages your core muscles.
- If using weights, hold the weight close to your chest with both hands.
- Begin by twisting your torso to the right side, bringing the weighted object (if using one) close to the floor next to your right hip. Keep your back straight and avoid hunching your shoulders.
- Pause briefly on the right side, feeling the contraction in your obliques.
- Return to the center, and then twist to the left side, bringing the weight next to your left hip.
- Continue alternating sides in a controlled manner. Aim for 10-20 twists on each side or as many as you can do with good form.
3. Breathing:
- Exhale as you twist to either side.
- Inhale as you return to the center.
4. Tips:
- Keep your core engaged throughout the exercise to stabilize your spine and protect your lower back.
- Maintain a straight back and avoid rounding your shoulders.
- Focus on the quality of the twist rather than speed. Slow and controlled movements are more effective and safer.
- If you find it challenging, you can start without weights and gradually add weight as you become more comfortable with the movement.
5. Modifications:
- To make it easier, you can keep your feet on the ground rather than lifting them.
- To make it more challenging, increase the weight you’re holding, extend your legs fully, or lift your feet higher off the ground.
6. Safety Precautions:
- If you have any back issues or injuries, consult with a healthcare professional before attempting Russian twists.
- Always use proper form to avoid straining your lower back or neck.
Incorporate Russian twists into your core workout routine to help strengthen your oblique muscles and improve your overall core stability.
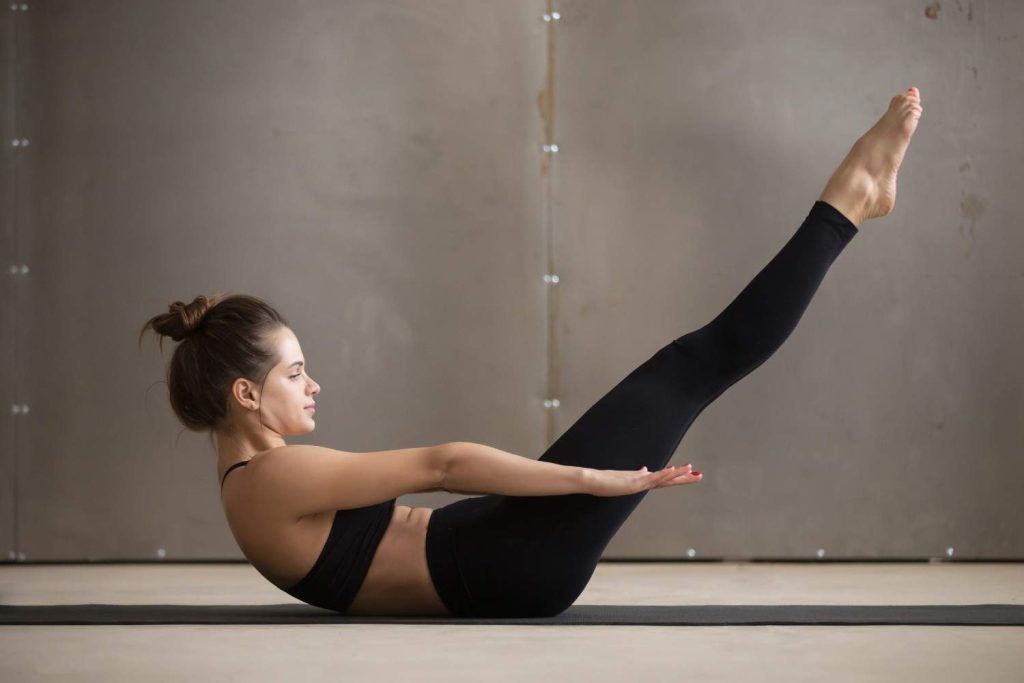
Leg raise
Leg raises are an effective exercise for targeting the lower abdominal muscles.
Here’s how to perform leg raises correctly:
1. Preparation:
- Lie down on your back on a flat surface, such as a mat or the floor. Extend your legs fully and keep them together.
- Place your arms by your sides, palms facing down. This is your starting position.
2. Execution:
- Engage your core muscles by pressing your lower back into the ground. This helps protect your lower back during the exercise.
- While keeping your legs straight, slowly lift them off the ground. You can lift them until they are perpendicular to the floor or go as high as your flexibility and strength allow. Ideally, aim to bring your legs to a 90-degree angle with your torso.
- Focus on using your lower abdominal muscles to lift your legs, rather than relying on momentum or swinging.
- Pause briefly at the top of the movement, squeezing your lower abs.
- Lower your legs back down to the starting position in a controlled manner. Avoid letting them drop quickly.
3. Breathing:
- Exhale as you lift your legs.
- Inhale as you lower them back down.
4. Tips:
- Keep your movements slow and controlled to maximize the effectiveness of the exercise and reduce the risk of straining your lower back.
- Avoid arching your back as you raise your legs. Keep your lower back pressed into the ground.
- If you find it challenging to keep your legs fully extended, you can bend your knees slightly, but try to maintain a consistent bend throughout the movement.
- To make the exercise more challenging, you can add ankle weights or hold a light dumbbell between your feet.
5. Safety Precautions:
- If you have a history of lower back issues or pain, consult with a healthcare professional before attempting leg raises.
- If you experience discomfort in your lower back during the exercise, reduce the range of motion or opt for alternative exercises that place less strain on the lower back.
Incorporate leg raises into your abdominal workout routine to strengthen your lower abs and improve core stability. Start with a few sets of 10-15 repetitions and gradually increase both sets and repetitions as your strength improves.
Kettlebell Swing
The kettlebell swing is a powerful full-body exercise that primarily targets the hips, glutes, and lower back. When performed correctly, it can also provide an excellent cardiovascular workout.

Here’s how to perform the kettlebell swing:
1. Select the Right Kettlebell:
- Choose a kettlebell with an appropriate weight for your fitness level. Beginners typically start with a lighter kettlebell (e.g., 15-25 pounds for women and 25-35 pounds for men).
2. Set Up:
- Stand with your feet shoulder-width apart.
- Place the kettlebell on the ground about a foot in front of you.
- Hinge at your hips and bend your knees slightly to lower your torso forward. Keep your back straight and chest up as you reach for the kettlebell with both hands. Your arms should be fully extended.
3. Grip the Kettlebell:
- Grab the kettlebell handle with both hands using an overhand grip (palms facing down). Your hands should be close together.
4. Perform the Swing:
- Begin the swing by driving your hips back and then explosively extending your hips forward. This motion should be powerful and explosive, similar to a hip thrust.
- As your hips move forward, let the kettlebell swing between your legs, but don’t let it touch your body. Your arms should remain straight, and your shoulders should stay down and back.
- At the highest point of the swing, your hips should be fully extended, and your body should form a straight line from your head to your heels. The kettlebell should reach chest level or slightly above it.
- As the kettlebell begins to descend, hinge at your hips and slightly bend your knees to guide the kettlebell back between your legs.
- Allow the kettlebell to swing back between your legs, but again, keep it clear of your body.
- Maintain a strong core throughout the movement to protect your lower back.
5. Breathing:
- Exhale forcefully as you swing the kettlebell up.
- Inhale as you guide the kettlebell back down.
6. Repetitions:
- Perform kettlebell swings in sets of 10-15 repetitions, or as needed according to your fitness level and workout routine.
7. Safety Precautions:
- It’s crucial to maintain proper form during kettlebell swings to prevent injury. If you’re new to this exercise, consider working with a certified kettlebell instructor to ensure you’re performing it correctly.
- Start with a lighter kettlebell to practice proper technique before progressing to a heavier weight.
- Avoid using your arms to lift the kettlebell; the power should come from your hips and glutes.
- Keep your neck in a neutral position, looking straight ahead, and avoid looking down or up during the swing.
Kettlebell swings are a dynamic and effective exercise that can be included in a full-body workout routine or as part of a high-intensity interval training (HIIT) workout for a cardiovascular challenge. Always prioritize safety and form when performing this exercise.
Crunches
Crunches are a common abdominal exercise that can help strengthen your core muscles, but it’s essential to note that they alone may not lead to significant fat reduction. Reducing body fat typically requires a combination of a healthy diet, cardiovascular exercise, and strength training.
Here’s how to perform crunches to target and strengthen your abdominal muscles:
1. Lie Down:
- Start by lying on your back on a flat surface, such as a mat or the floor.
- Bend your knees, keeping your feet flat on the ground, hip-width apart.
2. Hand Placement:
- Place your hands gently behind your head, lightly supporting your neck with your fingertips. Avoid pulling on your neck, as this can strain it.
3. Engage Your Core:
- Before you start the crunch, engage your abdominal muscles by drawing your navel in towards your spine. This helps protect your lower back and ensures that your abs are doing the work.
4. Perform the Crunch:
- Lift your upper body off the floor by curling your shoulders and upper back towards your thighs. Imagine you’re trying to bring your ribcage closer to your pelvis.
- Exhale as you lift your upper body and focus on contracting your abdominal muscles.
- Keep your lower back on the ground; do not arch it as you crunch up.
- Aim to raise your shoulders and upper back about 30-45 degrees off the ground. You don’t need to come all the way up; the focus is on the contraction of your abdominal muscles.
- Hold the top position briefly, feeling the tension in your abs.
5. Return to Starting Position:
- Inhale as you lower your upper body back down, with your head and shoulders gently touching the ground. Keep your core engaged.
- Do not let your head touch the ground completely to maintain tension in your abs.
6. Repetitions:
- Perform crunches in sets of 10-20 repetitions, or as needed according to your fitness level and workout routine.
7. Breathing:
- Exhale as you crunch up.
- Inhale as you lower your upper body back down.
8. Tips:
- Focus on the quality of the movement, not quantity. Ensure your abs are doing the work, not your neck or shoulders.
- Keep your elbows wide and your chest open to avoid pulling on your neck.
- Maintain a controlled and smooth tempo during the exercise.
- If you’re new to crunches, start with a small range of motion and gradually increase it as your core strength improves.
Remember that while crunches can help strengthen your abdominal muscles, they won’t specifically reduce body fat in that area. To achieve fat reduction and a well-defined core, it’s essential to incorporate a well-rounded fitness routine that includes cardiovascular exercise, a balanced diet, and other strength training exercises in addition to crunches. Always consult with a healthcare or fitness professional before beginning a new exercise program, especially if you have any medical conditions or concerns.
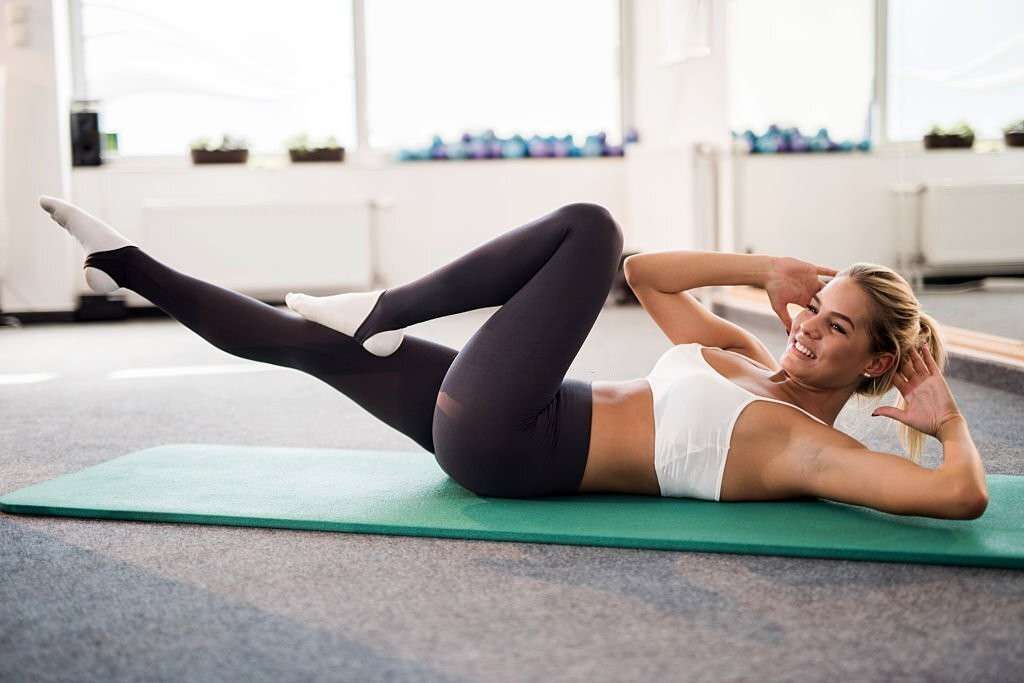
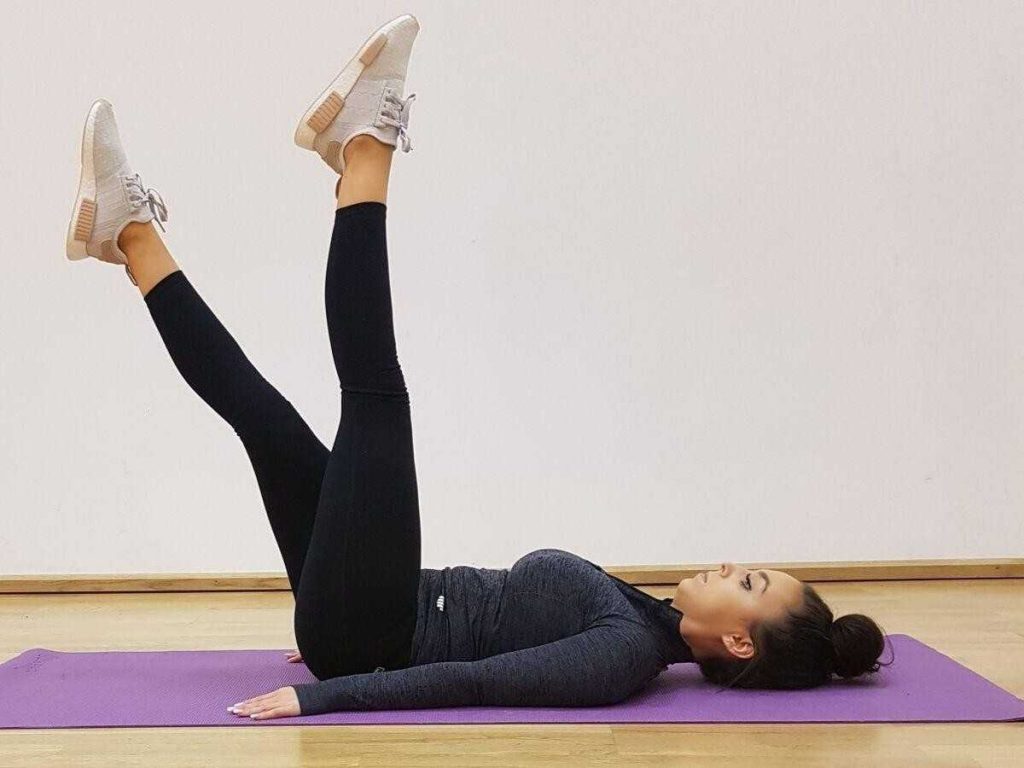
Flutter kicks
Flutter kicks are a core-strengthening exercise that targets the lower abdominal muscles and hip flexors.
Here’s how to perform flutter kicks correctly:
1. Lie Down:
- Start by lying on your back on a flat surface, such as a mat or the floor.
2. Position Your Body:
- Place your hands under your glutes, palms facing down. This helps support your lower back and keeps it pressed against the floor.
- Keep your legs straight and close together. Point your toes.
3. Engage Your Core:
- Before you begin the flutter kicks, engage your core by pressing your lower back into the ground. This helps protect your lower back during the exercise.
4. Perform the Flutter Kicks:
- Lift your legs a few inches off the ground.
- Alternate kicking your legs up and down in a quick, controlled motion, as if you are swimming or fluttering your legs.
- Keep your legs straight throughout the movement. The motion should come from your hips.
5. Breathing:
- Breathe naturally throughout the exercise. There’s no need to synchronize your breathing with the leg movements.
6. Repetitions:
- Perform flutter kicks in sets of 10-20 repetitions for each leg, or as needed according to your fitness level and workout routine.
7. Tips:
- Focus on maintaining a steady and controlled pace; avoid jerky or rushed movements.
- Keep your head and upper body relaxed on the floor, and try to minimize any arching in your lower back.
- If you feel strain or discomfort in your lower back, reduce the range of motion by lifting your legs less or by placing your hands slightly under your glutes for more support.
- To increase the intensity, lift your legs higher or increase the speed of the kicks.
8. Safety Precautions:
- If you have any lower back issues or injuries, consult with a healthcare professional before attempting flutter kicks.
- Ensure that your lower back remains in contact with the ground throughout the exercise to avoid straining it.
Flutter kicks can be incorporated into your core workout routine to help strengthen your lower abs and hip flexors. They are also commonly used in swim training to improve leg endurance. Always prioritize proper form and control when performing flutter kicks to maximize their effectiveness and reduce the risk of injury.
Side plank
The side plank is an effective core-strengthening exercise that primarily targets the oblique muscles.

Here’s how to perform a side plank correctly:
1. Starting Position:
- Begin by lying on your side on a mat or a flat surface.
- Place your elbow directly under your shoulder, bending it at a 90-degree angle.
- Stack your legs on top of each other, with your feet flexed. Your body should form a straight line from your head to your heels.
- Rest your other hand on your hip or place it on your upper hip to help with balance.
2. Engage Your Core:
- Before you lift your body into the side plank position, engage your core muscles. Imagine pulling your navel toward your spine. This will help stabilize your spine during the exercise.
3. Lift Your Hips:
- Push through your elbow and lift your hips off the ground. Your body should now be supported by your elbow and the side of your bottom foot.
- Keep your body in a straight line from head to heels.
- Your shoulder should be directly over your elbow, and your hips should be stacked on top of each other.
- Focus on maintaining a straight line; avoid letting your hips sag or sticking your butt up in the air.
4. Hold the Position:
- Hold the side plank position for as long as you can maintain proper form. Aim for 20-30 seconds initially and gradually increase the duration as your strength improves.
- Keep your breathing steady and relaxed while holding the position.
5. Repeat on the Other Side:
- After holding the side plank on one side, switch to the other side and repeat the exercise.
6. Variations:
- To make the side plank more challenging, you can lift your top leg or place your top foot in front of your bottom foot to decrease stability.
- You can also perform a side plank on your forearm instead of your hand.
7. Safety Precautions:
- If you have any shoulder, wrist, or elbow issues, consult with a healthcare professional before attempting side planks.
- Maintain proper alignment and avoid letting your hips sag to protect your lower back.
Side planks are excellent for building core strength and stability, particularly in the oblique muscles. They can be incorporated into your regular core workout routine or used as part of a full-body workout. Be patient and work on gradually increasing your hold time as you get stronger.
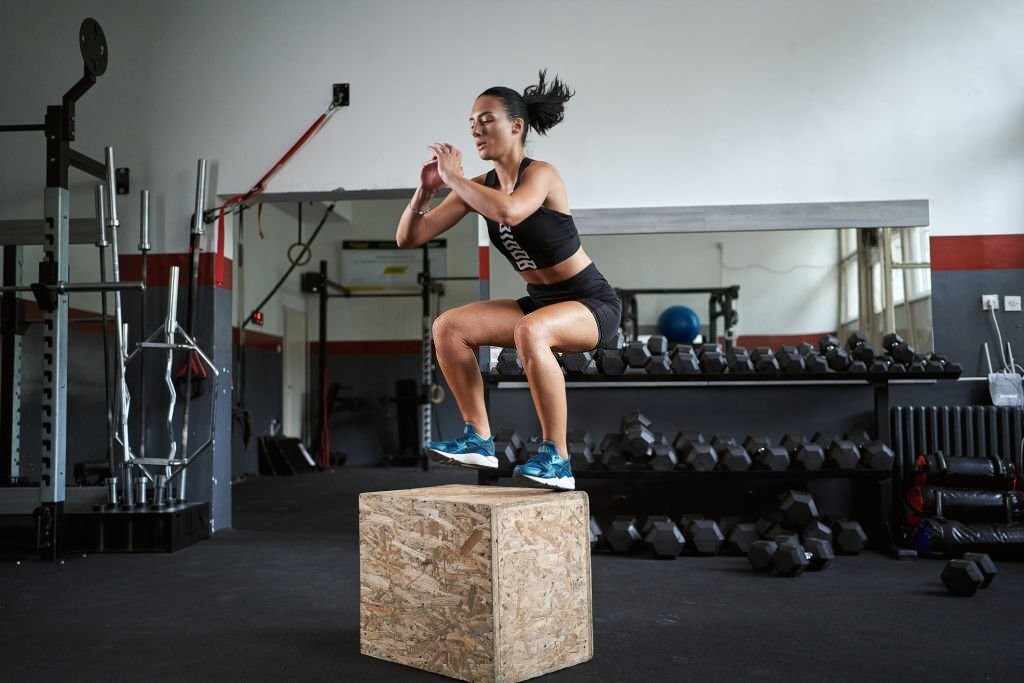
Squat Jumps
Squat jumps are a plyometric exercise that combines squats with explosive jumps, helping to build leg strength and power while also providing a cardiovascular workout.
Here’s how to perform squat jumps correctly:
1. Starting Position:
- Begin by standing with your feet shoulder-width apart, toes pointing slightly outward.
- Stand up straight with your chest up, shoulders back, and core engaged.
2. Perform the Squat:
- Initiate the movement by bending your knees and hips, pushing your hips back as if you’re sitting in a chair.
- Keep your back straight, and your knees should track over your toes. Aim to lower your body until your thighs are parallel to the ground or as low as your flexibility allows.
- Keep your weight on your heels throughout the squat to engage your glutes and hamstrings.
- Maintain a neutral spine by looking straight ahead or slightly upward.
3. Explosive Jump:
- From the bottom of the squat position, explosively push through your heels to straighten your legs and propel your body upward.
- As you jump, swing your arms upward to help generate momentum.
- Fully extend your hips and knees at the top of the jump, reaching your maximum height.
4. Landing:
- As you descend from the jump, land softly by bending your knees and hips to cushion the impact.
- Land with your knees slightly bent to absorb the shock and aim for a quiet landing with minimal noise.
5. Repeat:
- As soon as you land, immediately go into another squat, and then perform the next explosive jump.
- Continue this cycle for the desired number of repetitions or for a set amount of time.
6. Breathing:
- Exhale as you jump explosively.
- Inhale as you descend into the squat and prepare for the next jump.
7. Repetitions:
- Depending on your fitness level and goals, perform squat jumps in sets of 10-20 repetitions or for a set duration (e.g., 30 seconds to 1 minute).
8. Tips:
- Focus on maintaining proper squat form during each repetition, even when performing explosive jumps.
- Land softly and quietly to minimize the impact on your joints.
- Keep your jumps controlled and avoid flailing your arms or legs.
- Start with lower jumps and gradually work your way up to higher jumps as your strength and explosiveness improve.
9. Safety Precautions:
- If you have any knee or joint issues, it’s essential to consult with a healthcare professional before performing squat jumps.
- Always warm up adequately before plyometric exercises to prepare your muscles and joints.
- Use a soft surface or exercise mat if you’re performing squat jumps on a hard floor to reduce the impact on your joints.
Squat jumps are an effective exercise for building leg strength and power and can be a valuable addition to your workout routine, especially if you’re looking to improve your explosive strength and cardiovascular fitness.
High Knees
High knees are a dynamic exercise that can help improve cardiovascular fitness, leg strength, and coordination.

Here’s how to perform high knees correctly:
1. Starting Position:
- Stand up straight with your feet hip-width apart.
2. Proper Posture:
- Maintain good posture throughout the exercise. Keep your shoulders back and your chest up.
- Engage your core muscles to help stabilize your body.
3. Perform High Knees:
- Start by lifting your right knee as high as possible toward your chest while simultaneously raising your left arm in front of you.
- Try to bring your knee to at least hip level or higher.
- Keep your foot flexed, with your toes pointing upward.
- Quickly switch to your left knee, lifting it toward your chest while raising your right arm in front of you.
- Continue this alternating motion, as if you’re jogging in place while lifting your knees as high as you can.
4. Arm Movement:
- Coordinate the movement of your arms with your legs. As your right knee comes up, your left arm should come up, and vice versa.
- The arm movement helps to create momentum and balance in the exercise.
5. Tempo and Speed:
- Initially, start at a slow and controlled pace to get the hang of the movement.
- As you become more comfortable, increase the speed to make it a more intense cardiovascular exercise.
- Aim to perform high knees as quickly as you can while maintaining proper form.
6. Breathing:
- Breathe naturally throughout the exercise. There’s no need to synchronize your breathing with your knee lifts.
7. Duration:
- High knees can be done for a set duration, such as 30 seconds to 1 minute, or for a specific number of repetitions (e.g., 20 lifts per leg).
- Incorporate high knees into your warm-up routine or as part of a high-intensity interval training (HIIT) workout.
8. Tips:
- Focus on lifting your knees high, as this engages your hip flexors and core muscles.
- Keep your movements controlled and avoid excessive bouncing or leaning backward.
- Land softly on the balls of your feet to minimize the impact on your joints.
- Try to maintain a consistent pace, but slow down or take a break if you start to lose proper form.
9. Safety Precautions:
- If you have any knee or joint issues, perform high knees with caution or consult with a healthcare professional.
- Always warm up before performing high knees or any other high-impact exercise to prepare your muscles and joints.
High knees are an effective exercise for elevating your heart rate and improving lower body strength and coordination. They are versatile and can be incorporated into various workouts, from warm-ups to cardio routines.
Skipping
Skipping, also known as jump rope, is a fun and effective cardiovascular exercise that can help improve coordination, endurance, and overall fitness.

Here’s how to perform skipping correctly:
1. Get the Right Jump Rope:
- Start by selecting the right jump rope. It should be long enough so that the handles reach your armpits when you step on the center of the rope. You can adjust the length if necessary.
2. Proper Stance:
- Stand with your feet together and your knees slightly bent.
- Hold the jump rope handles in each hand, with your hands positioned at your sides, and your elbows bent at about a 90-degree angle.
3. Swing the Rope:
- Begin by swinging the jump rope over your head and behind you. Use your wrists and forearms to create the circular motion of the rope.
- As the rope comes back in front of you, jump slightly off the ground.
4. Jump Timing:
- Time your jump so that you clear the rope as it passes beneath your feet.
- Start with a basic two-foot jump, where both feet leave the ground at the same time and land together.
- Once you’re comfortable with this basic jump, you can try more advanced techniques like alternate foot jumps, boxer skips, or double unders (where the rope passes under your feet twice with each jump).
5. Maintain a Consistent Rhythm:
- Try to maintain a steady and even rhythm as you skip. Keep your jumps controlled and consistent.
6. Keep Your Body Upright:
- Maintain good posture throughout the exercise. Keep your chest up, shoulders relaxed, and your gaze forward.
- Avoid hunching your shoulders or leaning forward.
7. Breathing:
- Breathe naturally as you skip. There’s no need to synchronize your breathing with your jumps.
8. Duration:
- Skip for a set duration, such as 1-3 minutes, depending on your fitness level and the purpose of your workout.
- You can include skipping in your warm-up routine or as part of a high-intensity interval training (HIIT) workout.
9. Tips:
- Start with a slow and controlled pace if you’re new to skipping. As you become more comfortable, you can increase your speed and intensity.
- Land softly on the balls of your feet to minimize the impact on your joints.
- Experiment with different jump rope techniques to keep the exercise interesting and challenging.
- Consider using a mat or skipping on a softer surface if you’re concerned about the impact on your joints.
10. Safety Precautions:
- Ensure that you have enough clearance space around you to avoid tripping over objects or hitting things with the rope.
- If you have any knee or joint issues, perform skipping with caution or consult with a healthcare professional.
Skipping is a versatile and effective exercise that can be done almost anywhere and requires minimal equipment. It’s an excellent addition to your fitness routine for improving cardiovascular health and coordination.
Bicycle Crunches
Bicycle crunches are a highly effective core-strengthening exercise that targets the rectus abdominis (front of the abdomen) and oblique muscles (side of the abdomen).

Here’s how to perform bicycle crunches correctly:
1. Starting Position:
- Begin by lying on your back on a mat or a flat surface.
- Place your hands gently behind your head, interlocking your fingers, and supporting your neck. Avoid pulling on your neck, as this can strain it.
- Bend your knees and lift your feet off the ground, so your thighs are perpendicular to the floor, and your shins are parallel to the floor.
- Keep your lower back pressed into the ground by engaging your core muscles. This is your starting position.
2. Perform the Bicycle Crunch:
- Lift your head, shoulders, and upper back off the ground, bringing your right elbow and left knee toward each other, meeting in the center of your body.
- At the same time, straighten your right leg, hovering it just above the ground. Your left knee should be bent.
- Simultaneously, twist your torso, so your left elbow points towards your right knee.
- This motion creates a pedaling-like movement, resembling riding a bicycle.
- Repeat the motion on the opposite side, bringing your left elbow and right knee toward each other while straightening your left leg and twisting your torso.
- Continue alternating sides in a controlled and deliberate manner.
3. Breathing:
- Exhale as you crunch and bring your elbow and knee together.
- Inhale as you extend your leg and return to the starting position.
4. Repetitions:
- Perform bicycle crunches for a set number of repetitions (e.g., 10-20 per side) or for a specific duration, depending on your fitness level and workout routine.
5. Tips:
- Focus on the quality of the movement rather than speed.
- Keep your elbows wide and your chest open to avoid pulling on your neck.
- Aim to touch your elbow to the opposite knee or get as close as your flexibility allows.
- Keep your lower back flat on the ground to engage your core effectively.
- Maintain a steady and controlled pace throughout the exercise.
6. Safety Precautions:
- If you have any neck or back issues, consult with a healthcare professional before attempting bicycle crunches.
- If you experience discomfort in your lower back, reduce the range of motion or place your hands under your glutes for added support.
Bicycle crunches are an excellent exercise for strengthening the abdominal muscles and can be a valuable addition to your core workout routine. Always prioritize proper form and control to maximize their effectiveness and reduce the risk of injury.
Sit-ups
Sit-ups are a classic core-strengthening exercise that targets the rectus abdominis (the “six-pack” muscles) and also works the hip flexors.

Here’s how to perform sit-ups correctly:
1. Starting Position:
- Begin by lying on your back on a mat or a flat surface.
- Bend your knees, keeping your feet flat on the ground, hip-width apart.
- Place your hands behind your head, interlocking your fingers, and supporting your neck. Avoid pulling on your neck, as this can strain it.
2. Engage Your Core:
- Before you start the sit-up, engage your core muscles by pressing your lower back into the ground. This helps protect your lower back and ensures that your abs are doing the work.
3. Perform the Sit-Up:
- Lift your head, shoulders, and upper back off the ground while keeping your lower back pressed into the floor.
- Lead the movement with your chest, and aim to bring your chest toward your knees.
- Exhale as you lift your upper body.
- Keep your elbows wide and avoid pulling on your neck. Your hands should gently support your head but not provide significant lifting assistance.
- Continue the movement until your torso is at a 90-degree angle with your thighs or as close as your flexibility allows.
4. Return to the Starting Position:
- Inhale as you lower your upper body back down to the starting position, with your head and shoulders gently touching the ground.
- Do not let your head rest completely on the ground to maintain tension in your abs.
5. Repetitions:
- Perform sit-ups in sets of 10-20 repetitions, or as needed according to your fitness level and workout routine.
6. Breathing:
- Exhale as you lift your upper body.
- Inhale as you lower your upper body back down.
7. Tips:
- Focus on the quality of the movement rather than speed.
- Keep your feet flat on the ground throughout the exercise.
- Maintain a smooth, controlled pace.
- If you find it challenging, start with a smaller range of motion and gradually increase it as your core strength improves.
8. Safety Precautions:
- If you have any neck or back issues, consult with a healthcare professional before attempting sit-ups.
- If you experience discomfort in your lower back, reduce the range of motion or place your hands under your glutes for added support.
Sit-ups can be an effective exercise for strengthening the abdominal muscles when performed with proper form. However, it’s important to remember that there are many other core exercises that can also target your abs while minimizing strain on the neck and lower back.
Burpees
Burpees are a high-intensity, full-body exercise that combines strength training and cardio. They’re great for building endurance, and strength, and burning calories.
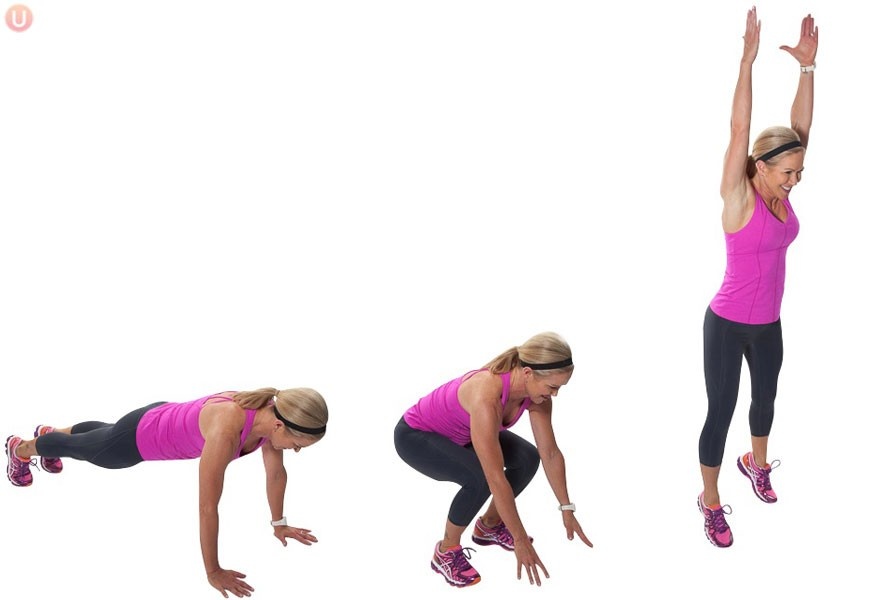
Here’s how to perform a basic burpee:
1. Starting Position:
- Begin in a standing position with your feet shoulder-width apart.
- Maintain good posture with your shoulders back and chest up.
2. Drop into a Squat:
- Bend your knees and hips to lower your body into a squat position.
- Place your hands on the ground in front of you, shoulder-width apart.
3. Kick Back into a Plank:
- Quickly kick your feet back behind you, so you’re in a plank position (like the top of a push-up).
- Keep your core engaged, and your body in a straight line from head to heels.
4. Perform a Push-Up (Optional):
- If you want to add an extra challenge, you can include a push-up here. Lower your chest toward the ground by bending your elbows, then push back up to the plank position.
- If you’re a beginner or want a less intense variation, you can skip the push-up.
5. Jump Your Feet Forward:
- Jump your feet back to the squat position quickly, so you’re back where you started.
6. Explosive Jump:
- From the squat position, explode upward into a jump.
- Reach your arms overhead as you jump, fully extending your body.
- Land softly, bending your knees slightly to absorb the impact.
7. Repeat:
- Immediately after landing, go into the next repetition by dropping back into the squat position and repeating the sequence.
8. Breathing:
- Exhale as you kick back into the plank position and perform the push-up (if included).
- Inhale as you jump your feet forward and exhale again as you explode into the jump.
9. Repetitions:
- You can perform burpees for a set number of repetitions (e.g., 10-15) or for a specific duration (e.g., 30 seconds to 1 minute) depending on your fitness level and workout routine.
10. Tips:
- Maintain a steady pace while performing burpees, but don’t rush. Focus on good form.
- Land softly on the balls of your feet to minimize the impact on your joints.
- Keep your core engaged throughout the exercise to maintain stability.
- If you’re new to burpees, start with a modified version that doesn’t include the push-up, and gradually work up to the full exercise.
11. Safety Precautions:
- If you have any medical conditions or joint issues, consult with a healthcare professional before attempting burpees.
- It’s essential to maintain proper form to avoid injuries, especially in your lower back and shoulders.
Burpees are an excellent addition to a high-intensity interval training (HIIT) workout and can help improve cardiovascular fitness and overall strength. As you become more proficient, you can add variations and challenges to make the exercise even more effective.